How the Paver Installation Process Works Step-by-Step
People searching for how the paver installation process works step-by-step are usually looking to understand the project and find local contractors who can expertly handle each stage.
Understanding how the paver installation process works step-by-step can help property owners make informed decisions about their outdoor projects. Whether planning a new patio, walkway, or driveway, knowing what to expect can ease concerns and ensure the project aligns with personal goals. Property owners in the area often explore this topic to better coordinate with local contractors, ensure quality results, and stay aware of the typical stages involved in professional paver installation services.
For those considering a paver project, familiarizing oneself with the installation process highlights the importance of working with experienced service providers. Local contractors who specialize in paver installation bring practical expertise to each stage, from initial site preparation to final finishing touches. Keeping informed about these steps can help property owners choose the right professionals to handle their project efficiently and effectively, ensuring a durable and visually appealing result.
- Patio or walkway installation - homeowners planning to enhance outdoor living spaces can rely on local contractors to handle the step-by-step process of paver installation.
- Driveway paving projects - individuals seeking durable and attractive driveways often work with local pros experienced in the paver installation process.
- Landscape renovation or upgrade - those updating their yards can find local service providers skilled in the detailed steps of paver installation for patios, paths, and more.
- Commercial paving jobs - businesses needing paved areas for parking or walkways can connect with local contractors familiar with the step-by-step installation process.
- Repair or replacement of existing pavers - property owners looking to restore or upgrade old paving surfaces can depend on local pros to manage the entire installation process.
When homeowners search for information on how the paver installation process works step-by-step, they are often looking to understand the entire project flow-from initial planning to the final finished surface. Many people consider paving projects to enhance outdoor living spaces, improve curb appeal, or create functional surfaces for driveways, walkways, patios, or pool decks. These plans typically involve replacing old, damaged, or unattractive surfaces with new pavers that offer durability and aesthetic appeal. Understanding the process helps homeowners feel more confident about what to expect and how local contractors can assist in turning their vision into reality.
This topic is closely related to common problems such as cracked or uneven existing surfaces, drainage issues, or outdated outdoor layouts that no longer meet the homeowner’s needs. It also ties into plans for new installations where property owners want to expand outdoor living areas or improve accessibility. The paver installation process involves several key steps that ensure a stable, long-lasting surface, making it important for homeowners to know what each stage entails. Local service providers bring expertise to each phase, from site preparation to finishing touches, helping to address potential issues early and ensure the project adheres to best practices.
Properties that typically come up in discussions about paver installation include residential yards, commercial walkways, driveways, and public spaces. These projects often involve different types of properties, ranging from small backyard patios to large commercial parking lots or community spaces. The specific needs of each property influence how the installation process is carried out, with considerations for soil type, property size, and intended use. Local contractors are experienced in adapting the process to suit various property types, ensuring the finished surface is both functional and visually appealing.
Understanding how the paver installation process works step-by-step helps homeowners see how each stage contributes to a successful project. From initial site assessment and excavation to base preparation, paver laying, and joint filling, each step plays a vital role in creating a durable, attractive surface. While the process may seem straightforward, working with local pros ensures that each phase is executed properly, addressing potential challenges along the way. This knowledge empowers property owners to make informed decisions and collaborate effectively with service providers to achieve the desired outdoor improvements.
Concrete paving projects - local contractors skilled in preparing subbases and laying durable surfaces are essential for successful paver installation processes.
Patio and walkway construction - these projects require precise planning and layout, similar to the steps involved in paver installation.
Landscape edging services - installing borders and defining spaces involves planning and material placement comparable to paver projects.
Driveway resurfacing and repair - these services involve surface preparation and layering techniques aligned with paver installation methods.
Retaining wall building - constructing retaining structures requires excavation and foundational work similar to paver base preparation.
Outdoor flooring installation - installing various types of outdoor surfaces involves planning, leveling, and material handling akin to paver installation steps.
When evaluating local contractors for paver installation services, it’s important to consider their experience with similar projects. Homeowners should seek out service providers who have a proven track record of completing paver installations comparable in scope and complexity to their own. An experienced contractor will be familiar with the nuances of the process, including site preparation, material selection, and proper installation techniques, which can contribute to a smoother workflow and a quality finished product. Asking for examples of past work or references related to similar projects can help gauge a contractor’s familiarity with the specific steps involved in the paver installation process.
Clear, written expectations are essential when comparing local service providers. Homeowners should look for contractors who provide detailed project outlines, including the scope of work, materials to be used, and the sequence of installation steps. This transparency helps ensure everyone understands what will be done and reduces the likelihood of misunderstandings. It’s also beneficial to review any written estimates or proposals carefully, as they can serve as a roadmap for the project and clarify what is included in the service, from initial site prep to the final finishing touches.
Reputable references and effective communication are key indicators of a reliable paver installation contractor. Service providers who can offer references from previous clients-particularly those who had similar projects-are often more trustworthy. Good communication from the outset can help homeowners feel confident that questions will be answered promptly and that the contractor is attentive to details. When comparing local pros, it’s worthwhile to assess how clearly they explain their process, respond to inquiries, and demonstrate professionalism, as these qualities often reflect their ability to manage the project smoothly and keep homeowners informed throughout each step of the installation process.
Property owners often search for how the paver installation process works step-by-step when they are planning practical projects around their homes and businesses. Local pros provide Paver Installation Process services for everyday jobs and straightforward project options.

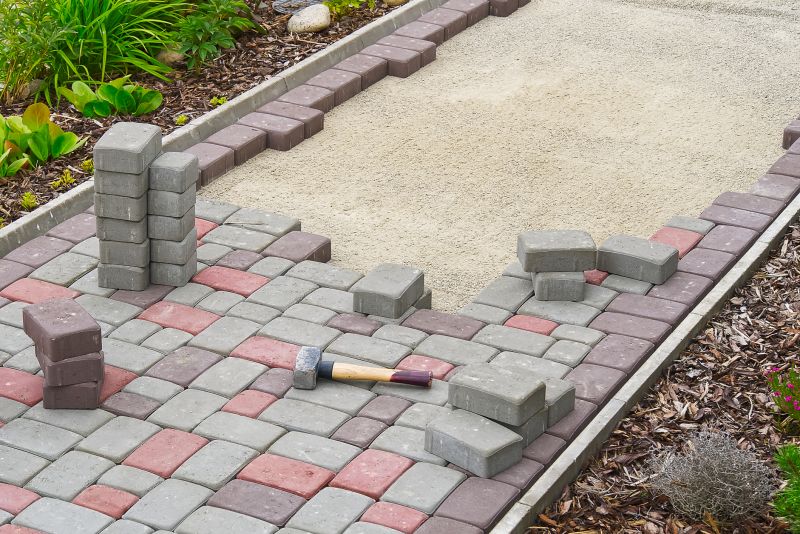
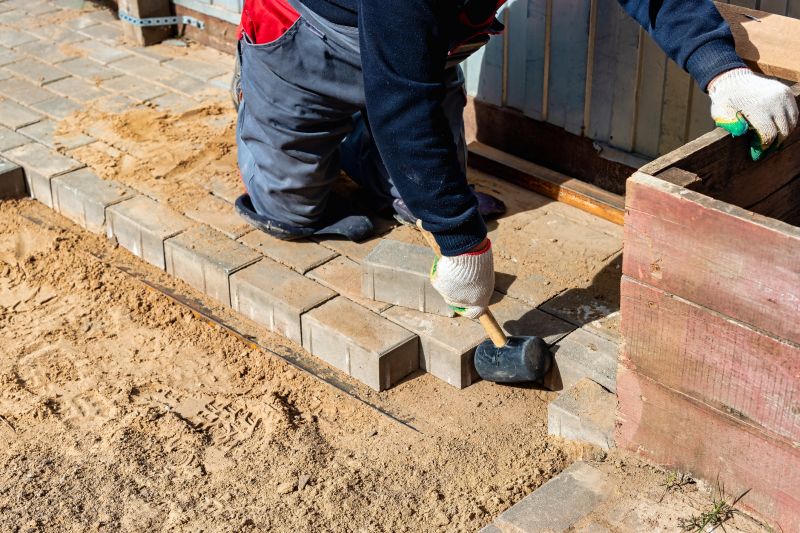
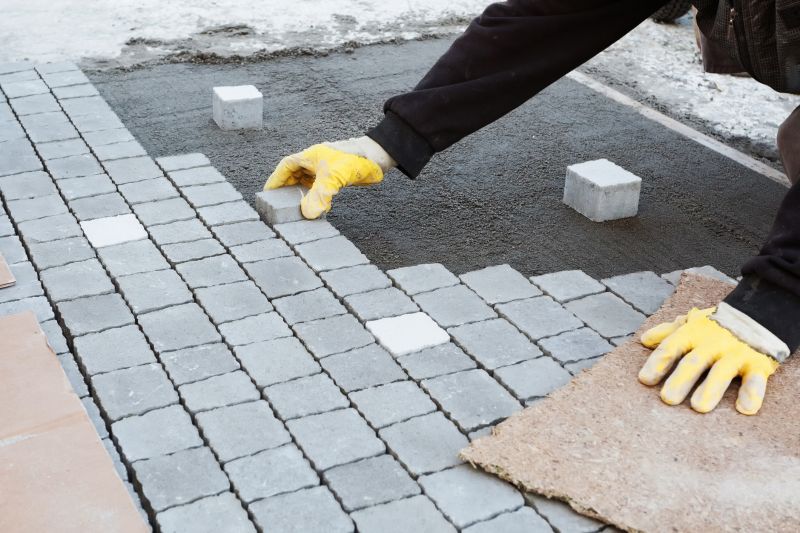
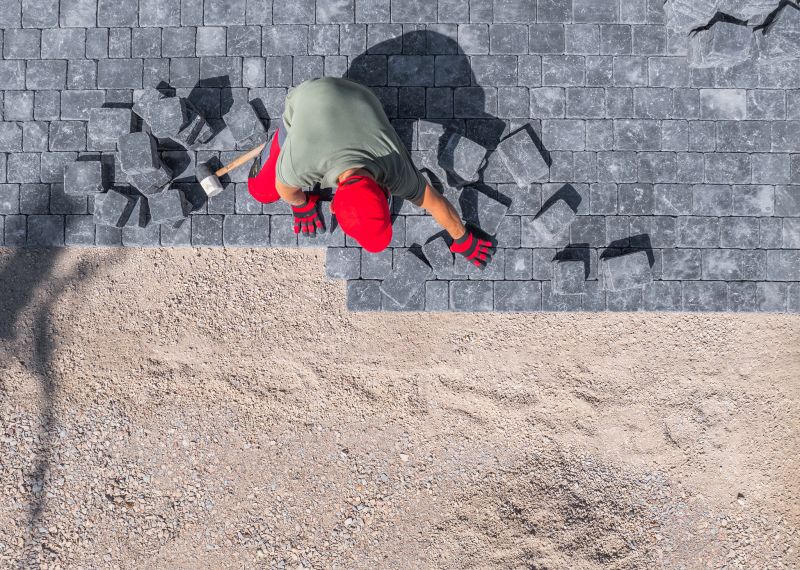
Understanding how the paver installation process works step-by-step can help property owners plan their outdoor projects more effectively. Typically, local contractors start by preparing the area, which involves clearing the space and ensuring the ground is level. They then lay a foundation of gravel or sand to create a stable base for the pavers, helping to prevent shifting or uneven surfaces over time. Once the base is set, the pavers are carefully laid out in the desired pattern, ensuring proper alignment and spacing. Finally, the installation is completed with edging and joint filling to secure the pavers in place, resulting in a durable and attractive surface for walkways, driveways, or patios.
Many property owners in the area look up this process to understand what’s involved before hiring local service providers. Knowing the steps involved can also help them make informed decisions about their outdoor space improvements. Reaching out to local contractors who specialize in paver installation can ensure the job is done correctly and efficiently. These experienced service providers are familiar with the typical process and can guide property owners through each stage, from preparation to finishing touches, to achieve a long-lasting and visually appealing result.
What is the first step in the paver installation process? The initial step involves preparing the site, which includes clearing the area, removing existing materials, and assessing the ground to ensure proper drainage and stability, a task handled by local contractors.
How do local service providers handle the base installation? They typically excavate the area to the correct depth, then lay a gravel or sand base layer that provides a stable foundation for the pavers, ensuring long-lasting results.
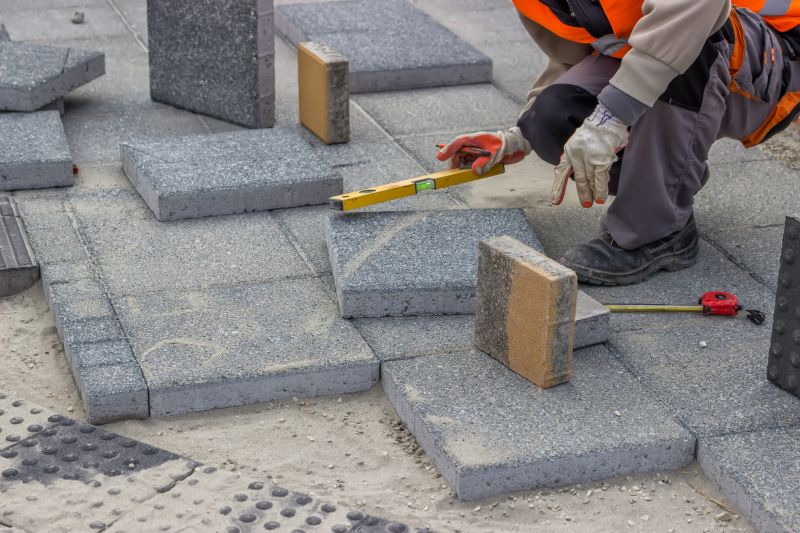
What is involved in laying the pavers during installation? Pavers are carefully placed according to the chosen pattern or design, with local pros ensuring proper alignment and spacing for a uniform appearance.
How do professionals finish the paver installation? After placing the pavers, they typically add joint sand or mortar, then compact the surface to lock the pavers in place and ensure durability.
What steps are taken after the pavers are installed? The final phase usually includes cleaning the surface and applying any necessary sealing or protective treatments, which local contractors can provide to maintain the pavers' appearance and longevity.
Understanding site preparation - property owners can work with local contractors to ensure the area is properly cleared and leveled before installation begins.
Selecting paver materials - choosing the right type of pavers helps property owners match their project’s style and durability needs with the help of local service providers.
Learning about base installation - property owners can collaborate with local pros to ensure a solid foundation is laid for long-lasting results.
Final paving and finishing - understanding how the pavers are laid and sealed allows property owners to plan for a polished, professional-looking surface.
If you are thinking about how the paver installation process works step-by-step for a property, this guide is meant to help you understand this topic, the typical project types, and how different options might fit your plans.
When you are ready, you can use the quote form on this page to share a few details about your project. From there, local pros can review the basics and follow up with options that match what you have in mind.